There’s nothing worse than stepping into the shower, looking forward to a relaxing, warm stream of water, only to be met with an unexpected blast of icy coldness. For those with a gas water heater, this sudden chill can often be attributed to the pilot light going out, which could be due to a malfunctioning gas valve. While this may initially seem like a problem that requires a professional plumber’s touch, the truth is that relighting the pilot light on your gas water heater is a task many homeowners can tackle themselves—provided they know how to do it safely, including proper use of the gas knob.
If you’re a homeowner, renter, or property manager in Australia, this guide is for you. We understand the unique conditions and plumbing systems commonly found in Australian homes, so we’ve tailored our advice to suit local gas hot water system and appliances. Whether you have an older model hot water tank gas hot water heater with a manual ignition system. or a newer, more modern unit with piezo or electronic ignition, we’ll walk you through the steps required to relight your water heater’s pilot light.
It’s important to remember that while relighting the pilot light is a relatively simple process, it must be done with caution and according to the safety instructions. A gas appliance presents potential risks, so knowing how to safely manage the situation will give you peace of mind while avoiding any unnecessary damage to your appliance and ensuring the desired temperature is maintained.
In this guide, we’ll cover the common causes behind pilot light failures, the different types of gas water heaters you might encounter, essential safety precautions, and the lighting instructions for relighting the pilot light on your gas water heater.
Let’s get started and have you back in hot water in no time.
Why the Pilot Light Goes Out
Before you attempt to relight your gas water heater’s pilot light, it’s essential to understand why it went out in the first place. Identifying the root cause of the issue can help you prevent future occurrences and ensure your system operates safely and efficiently. There are several common reasons Australian households experience pilot light failure and understanding each one can make all the difference in maintaining your hot water system—especially when the system fails. Here, we’ll explore the most frequent causes and offer possible solutions for each.
1. Strong Winds or Drafts
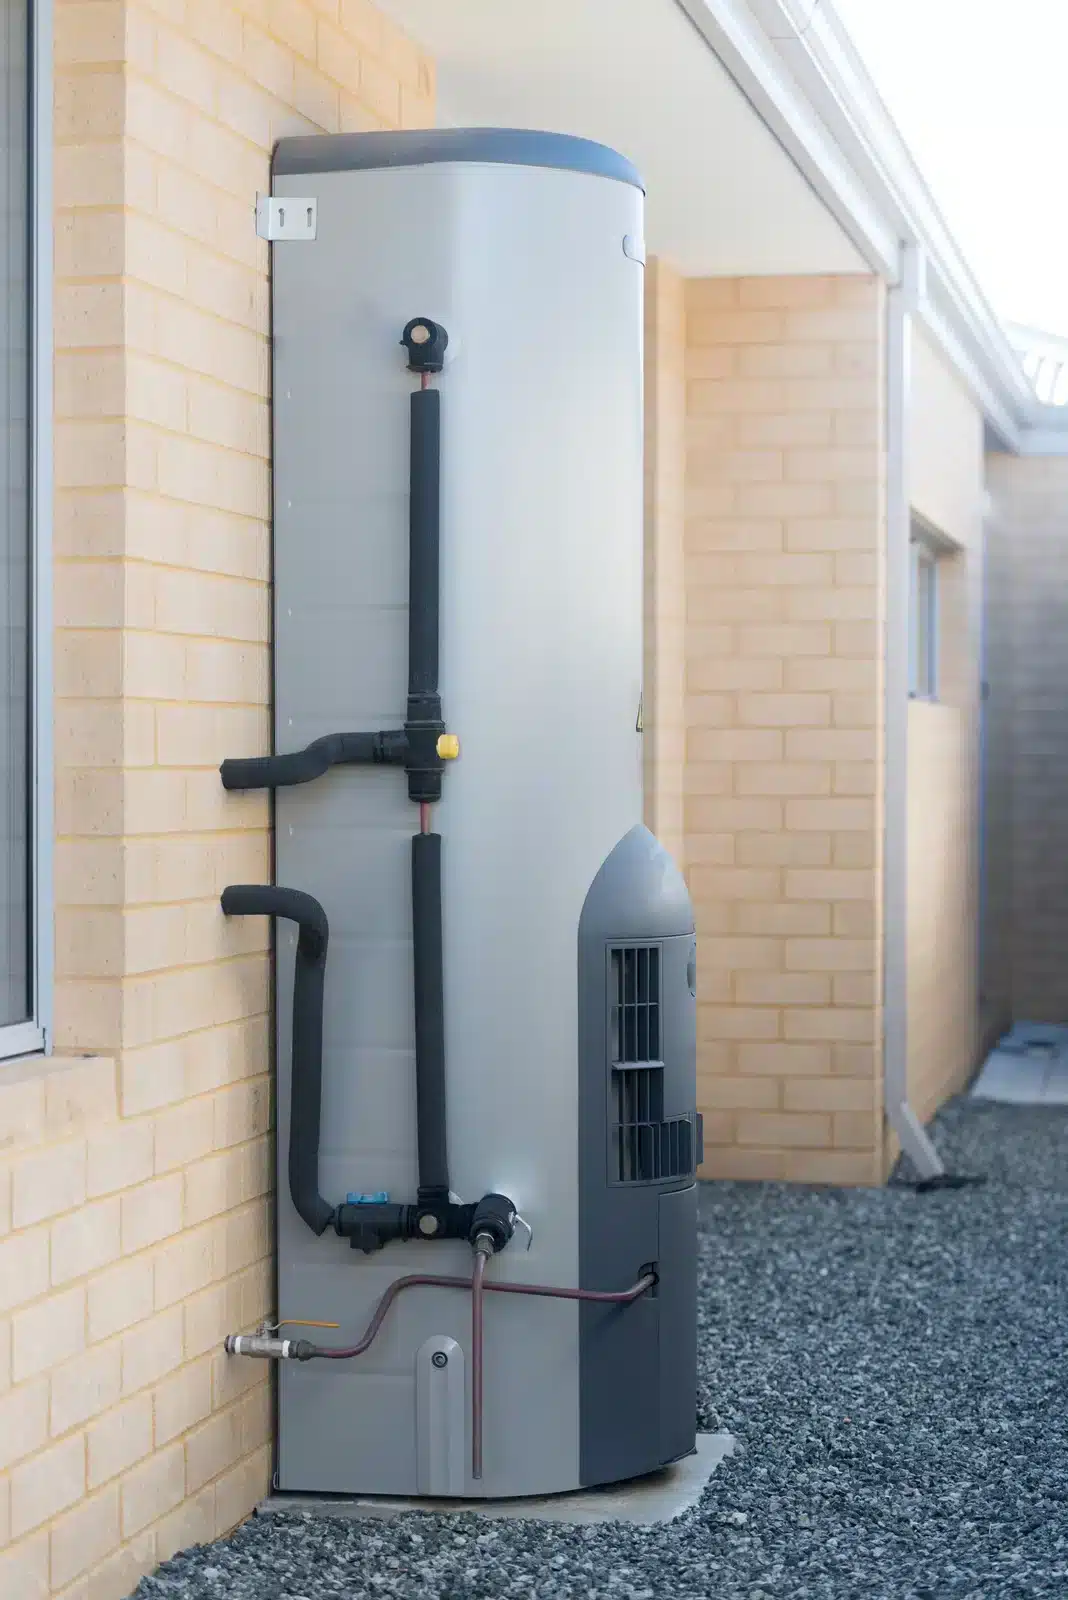
In many Australian homes, gas hot water systems are installed outdoors. This is especially common in cities like Sydney, Brisbane and Perth, where the mild climate makes outdoor installation practical and space-saving.
However, outdoor units can be quite vulnerable to the elements—particularly strong winds and sudden drafts. This is even more noticeable in coastal areas or properties with open layouts and exposed corners.
Strong gusts of wind can easily blow out the pilot flame, especially if the heater doesn’t have a protective wind guard. Placing the unit near a corner or a wall can also cause wind to funnel directly towards the flame, increasing the likelihood of it going out.
Tip: If your heater is located in a windy or exposed area, consider installing a wind shield around the burner assembly. Alternatively, relocating the unit to a more sheltered position can help protect it from the elements and reduce pilot light issues caused by wind.
2 Disruption to Gas Supply
Another common reason your pilot light might go out is a disruption to your gas supply. If you’re using an LPG (liquefied petroleum gas) system, an empty gas bottle is often the culprit. These bottles can run out unexpectedly—especially if they’ve been in use for a long time without being checked.
Gas leaks can also cause the pilot flame to extinguish. If gas isn’t flowing properly to the burner, the flame will go out, sometimes accompanied by a noticeable gas smell.
For homes connected to mains gas, temporary service disruptions or maintenance work can interfere with your supply. While suppliers usually give advance notice of planned outages, unplanned interruptions can occur without warning.
If your pilot light goes out and there’s no clear reason why, it’s a good idea to check for service issues in your area—especially if you’re experiencing other unusual symptoms.
Steps to Check:
- LPG: Inspect the regulator on your gas cylinder. If it appears frosty or shows low pressure, the bottle may be empty. You can also weigh the bottle to check how much gas is left.
- Mains Gas: Contact your gas supplier or visit their website to see if there are any planned works or known outages in your area.
If you suspect a gas leak, turn off the gas supply at the source immediately. Do not attempt to fix it yourself. Instead, contact a licensed gas fitter straight away for a professional inspection.
3. Faulty Thermocouple
The thermocouple is an essential safety feature in your gas water heater. Its job is to detect whether the pilot flame is burning and only allow gas to flow when it is. If the pilot light goes out, the thermocouple automatically shuts off the gas supply to prevent leaks.
Over time, the thermocouple can become dirty, misaligned, or wear out due to age. When this happens, it may incorrectly detect that the flame is out—even if it’s still burning—causing the gas to shut off unnecessarily.
If your pilot light relights but won’t stay on, it’s often a sign the thermocouple is faulty or not sensing the flame properly.
What to Do:
- You can try gently cleaning the thermocouple using a soft cloth or wire brush. Remove any soot, dust, or debris that might be affecting the sensor.
- If cleaning doesn’t fix the problem, the part may need replacing. Thermocouples are relatively affordable, but care is needed during installation.
If you’re not confident handling gas components yourself, it’s best to call a licensed professional. They can safely inspect and replace the thermocouple if necessary.
4. Dirty Pilot Assembly
Outdoor gas water heaters are often exposed to dust, dirt, and debris, especially in areas with lots of insects or strong winds. Over time, the pilot assembly can become clogged with spider webs, bugs, or general grime. This build-up can interfere with gas flow to the pilot light.
When the pilot orifice is partially blocked, the flame may appear small, yellow, or flickering. A healthy flame should be steady and blue. If the flame is weak or inconsistent, your heater may struggle to stay lit or ignite properly.
Cleaning Tip:
You can gently clean the pilot assembly using a soft brush, thin wire, or needle to remove any blockages. Be careful not to bend or damage the components—they can be fragile.
If you’re unsure or uncomfortable doing this yourself, it’s a good idea to call a licensed professional. They can clean the assembly thoroughly and safely restore proper function.
5. Ageing Components
Like all appliances, your gas water heater’s components wear down over time. If your system is more than 10 years old, it’s possible that the parts responsible for maintaining a stable pilot light—such as the thermocouple, pilot assembly, or control valve—may no longer function reliably. Constantly having to relight the pilot light is often an indication that these components are degrading or nearing the end of their lifespan.
What to Do:
- If your system is getting on in years, it’s wise to keep an eye out for recurring problems with the pilot light or other components.
- If you find yourself relighting the pilot light frequently, it may be time to consult a professional to assess the overall condition of your system and recommend repairs or replacement if necessary.
In many cases, investing in a new hot water system can help you avoid future frustrations and increase the overall efficiency of your home’s water heating.
Safety Comes First
Before you even think about striking a match or pushing a button to relight your gas water heater’s pilot light, it’s crucial to prioritise safety. Gas appliances, while generally safe when properly maintained, can pose significant risks if mishandled or neglected. Taking the necessary precautions not only ensures that you safely relight your system for that hot shower but also helps prevent accidents or injuries that could otherwise be easily avoided. Here are the key safety steps you must follow before attempting to relight your gas water heater.
1. Ventilate the Area
The first thing to do when dealing with any gas appliance is to ensure proper ventilation. Gas can build up quickly in an enclosed space, especially if there’s a leak or residual gas. This creates a hazardous situation.
Before attempting to relight the pilot light, open nearby windows and doors to allow any trapped gas to disperse into the open air. This is especially important in spaces with poor airflow.
Even if your gas water heater is outdoors, it’s still important to ensure natural airflow around the unit. Clear the area of any obstructions to allow for better ventilation.
This step isn’t just precautionary—it’s essential for clearing away any lingering gas and reducing the risk of accidental ignition or explosion. Always wait until the area is properly ventilated before proceeding.
2. Smell for Gas
Gas is odourless, making leaks hard to detect. To help, suppliers add a chemical called mercaptan to give gas a distinctive rotten egg smell. If you detect this odour, do not attempt to relight the pilot light or create a spark. This indicates a dangerous gas leak.
If you smell gas:
- Do not try to relight the pilot light, operate the appliance, or switch electrical devices on or off.
- Leave the area immediately and ensure everyone in the household is safe.
- Once at a safe distance, contact your gas provider or emergency services (000). They can assist and send a professional to handle the leak.
Gas leaks are dangerous, and even a small spark can cause an explosion. Always exercise caution and never attempt to fix a gas leak yourself.
3. Turn Off the Gas Control
Before relighting the pilot light, ensure the gas control knob on the water heater is set to ‘Off’. This stops any gas from flowing to the burner while you’re working on the system.
Wait at least five to ten minutes to allow any remaining gas to dissipate. Don’t rush this step—letting all the gas clear is crucial for safety.
If you try to relight the pilot light before the gas clears, there’s a risk of ignition, which can lead to an explosion. Keep all sources of ignition, such as matches or electrical sparks, away during this waiting period.
4. Read the Manufacturer’s Instructions
Every gas water heater model is different, and manufacturers often have specific instructions for relighting the pilot light. It’s important to follow these guidelines carefully to avoid damaging your system or putting yourself at risk.
Look for the instruction sticker on your heater or refer to the user manual. If you can’t find it, try searching online using the model number, or visit the manufacturer’s website for guidance on the lighting process. Many provide digital copies of their manuals or troubleshooting advice.
By following the manufacturer’s instructions, you ensure the appliance is used safely and correctly. If you’re unsure about any step, it’s best to consult a professional to handle the task.
5. Check for Physical Damage
Before relighting your gas water heater, inspect the system for any visible damage. Look for signs such as rust, corrosion, burn marks, or water leakage. These could indicate a more serious problem with your unit that might require you to replace.
Rust or corrosion weakens the structure, while water leakage may signal a crack in the tank. Burn marks suggest the appliance has been exposed to extreme heat or malfunctioned. Continuing to use a damaged unit can be dangerous.
If you notice any of these issues, don’t attempt to relight the pilot light. Instead, contact a licensed gas fitter or plumber. They can assess the damage and recommend repairs or replacements. In some cases, replacing the unit might be a safer and more cost-effective solution.
Understanding Your Gas Water Heater
Before attempting to relight your gas water heater’s pilot light, it’s important to understand the system you’re dealing with. Gas water heaters come in various models, so knowing your ignition system type will help you follow the correct procedures.
Whether your unit has an ignitor button or uses manual ignition, understanding these differences ensures you tackle the issue correctly. Additionally, knowing if your system is installed indoors or outdoors is key for safety and troubleshooting.
In this chapter, we’ll cover the different ignition methods, the distinction between indoor and outdoor systems, and how to locate your model and serial number. This information will help you make informed decisions about repairs or replacements.
1. Ignition Methods
There are three main types of ignition systems commonly found in gas water heaters: manual ignition, piezo ignition, and electronic ignition. Each system functions differently, so understanding how they work is essential for relighting your pilot light or troubleshooting issues.
Manual Ignition: Found in older models, manual ignition requires you to light the pilot flame with a match or lighter. You’ll need to hold down the gas control knob while lighting the pilot. This system is more labour-intensive but reliable.
Pro Tip: If your system has manual ignition, hold the control knob down for a few seconds after lighting the pilot to let the thermocouple register the flame. This helps maintain a stable gas flow.
Piezo Ignition: This modern, user-friendly system uses a push-button mechanism to create a spark that ignites the pilot light. It’s commonly found in mid-range models and is safer since there’s no need for open flames.
Tip: Piezo ignition systems require little maintenance, but if the spark isn’t working, the button may need cleaning or replacement.
Electronic Ignition: The most advanced system, electronic ignition doesn’t keep a pilot flame lit at all times, saving energy. It uses a circuit or sensor to ignite the flame only when hot water is needed.
Note: Electronic ignition systems are more technical. If the system isn’t responding or needs resetting, it might require professional attention.
2. Indoor vs Outdoor Systems
Gas water heaters can be installed indoors or outdoors, each with its own pros and cons. Outdoor systems are generally easier to maintain and offer better access for repairs. However, they are exposed to the elements, which can cause issues like wind blowing out the pilot light, moisture damage, or corrosion.
To protect outdoor systems, it’s essential to install wind shields in areas with strong winds and clean the unit regularly to prevent debris build-up.
Indoor systems, on the other hand, are more sheltered from the weather but require careful attention to ventilation. These units must meet strict ventilation standards to prevent dangerous gas buildup. It’s vital to ensure proper airflow and clear vents of obstructions to avoid malfunction and maintain safety.
Regardless of the system type, proper installation, regular maintenance, and following manufacturer guidelines are crucial for keeping your gas water heater running safely and efficiently.
3. Locating the Model and Serial Number
The model and serial number of your gas water heater are usually found on a label or sticker on the side or base of the unit. The exact location may vary slightly depending on the manufacturer, but it’s generally easy to spot with a quick inspection. The model number identifies the specific make and model of your unit, while the serial number is unique to your appliance. These numbers are essential for ordering replacement parts or seeking professional help.
It’s a good idea to record both numbers in a safe place, such as a maintenance log or on your phone, for future reference. This will save time when replacing parts or contacting customer support. If the label is faded or hard to read, you can check the user manual, visit the manufacturer’s website, or contact their customer service for assistance in identifying the details. Having this information handy will help you get the correct parts or support when troubleshooting or servicing your water heater.
Tools and Materials You’ll Need
Before you start, gather the following:
- Torch or headlamp (for dark or low-access areas)
- Long-reach lighter or safety matches (for manual ignition)
- Protective gloves and safety glasses
- Flathead screwdriver (to remove access panels)
- The user manual or instruction sticker on the unit
Having everything within arm’s reach will make the job quicker and safer.
How to Relight the Pilot Light – Step-by-Step
Let’s now walk through the process of safely and effectively relighting the pilot light on your gas water heater. These steps are designed for systems that use a manual or piezo ignition method, which are common in many Australian homes. Before starting, make sure you’ve followed all the safety precautions outlined in Chapter 2 on how to relight gas water heater, including ventilating the area and checking for the smell of gas.
Step 1: Open the Access Panel
Find the access panel at the base of the water heater. This panel covers the burner and pilot light assembly. It may slide out or need unscrewing. Remove it carefully and set it aside. Familiarise yourself with the layout inside, including the pilot light tube, burner, and ignition button (if applicable).
Step 2: Turn the Gas Control Knob to ‘Off’ and Wait
Turn the gas control knob to the ‘Off’ position to stop the gas flow. Wait at least 5 to 10 minutes to allow any residual gas to dissipate. Never skip this step, as it reduces the risk of fire or explosion.
Step 3: Turn the Control Knob to ‘Pilot’
After waiting, turn the control knob to the ‘Pilot’ setting. You may need to press it slightly inward to engage pilot mode. This allows a small amount of gas to flow to the pilot light for ignition.
Step 4: Hold the Knob Down
While the knob is in the ‘Pilot’ position, press and hold it down. This lets gas flow steadily to the pilot light tube. Hold it throughout the ignition process to ensure the flame lights and stays on long enough for the thermocouple to register.
Step 5: Ignite the Flame
- For Piezo Ignition: Press the piezo ignition button, usually located next to the gas control knob. Press it several times, if necessary, until you hear a clicking sound and see a small flame ignite at the pilot.
- For Manual Ignition: Use a long-reach lighter or match. While holding the gas control knob down, carefully place the flame at the pilot light opening or tube. You should see the flame catch quickly if the gas is flowing correctly.
Step 6: Continue Holding the Knob
After the pilot flame lights, keep holding the knob down for 30 to 60 seconds. This gives the thermocouple time to heat up and confirm that the flame is stable. Releasing the knob too soon may cause the flame to go out.
Step 7: Slowly Release and Observe
After holding the knob for the recommended time, slowly release it. Observe the pilot light. If the flame remains steady, you’ve relit it successfully. If it goes out, repeat the process, holding the knob down for a longer period to allow the thermocouple to respond.
Step 8: Turn the Control Knob to ‘On’
Once the pilot light stays on, turn the control knob to ‘On.’ This activates the main burner, which should ignite shortly. If the main burner doesn’t light, double-check the settings and flame before trying again.
Step 9: Replace the Access Panel
Once the flame is steady and the main burner is operational, replace the access panel you removed. Secure it with screws, clips, or fasteners. This protects the internal components and ensures proper airflow for efficient combustion.
By following these steps carefully, you can safely relight the pilot light on your gas water heater and restore hot water. Always refer to your unit’s instructions if needed, and contact a licensed gas fitter if the pilot light won’t stay on or if you’re unsure about any part of the process.
Troubleshooting When It Won’t Stay Lit
If your pilot light won’t stay lit despite following the correct procedure, don’t worry—there are steps you can take before calling a professional. This is a common issue in Australian homes, especially with older or outdoor units. While relighting is straightforward, persistent failure may point to more complex problems. Here’s how to troubleshoot and what to try next.
1. Hold the Knob Longer
A simple solution is to hold the gas control knob down for a longer period. Most instructions suggest 30 to 60 seconds, but this may not be enough, especially with older units or worn thermocouples. Try holding the knob for up to 90 seconds. This allows the thermocouple more time to heat up and signal the gas valve to continue supplying gas.
2. Clean the Pilot Orifice
If the pilot light is weak, flickering, or doesn’t stay lit, the pilot orifice may be blocked. Outdoor systems are especially prone to dust, spider webs, and insects. These blockages can affect gas flow and ignition. Use a thin wire or needle to gently clean the orifice, being careful not to damage surrounding components. A soft brush can also help remove debris. Always ensure the system is turned off and cool before cleaning.
3. Check the Gas Supply Again
Double-check your gas supply to ensure its steady. For LPG systems, confirm the gas cylinder isn’t empty and inspect the regulator for icing, damage, or low pressure, especially if you’re also using an electric hot water system. If the cylinder feels light or the flame is weak, a refill may be needed. For mains gas, ensure the shut-off valve is fully open and check with your gas provider for any outages or maintenance in your area. Sometimes, the issue is simply an overlooked closed valve.
4. Call a Professional
If the pilot still won’t stay lit after trying all the above steps, it’s time to call a licensed gas fitter. The issue could be a faulty thermocouple, damaged gas control valve, or another internal fault. These require professional tools and expertise to fix safely. Attempting more repairs without identifying the cause could cause further damage or safety risks. In Australia, only licensed professionals can carry out major gas repairs or installations, ensuring the work is done correctly and safely.
When to Call a Licensed Gas Fitter
While many homeowners in Australia are capable of safely relighting a gas water heater pilot light, there are clear circumstances where it’s not only safer—but absolutely necessary—to leave the job to a licensed gas professional. Knowing when to stop and seek expert help is essential to maintaining the safety of your home, your family, and yourself. Gas is not something to take lightly, and attempting repairs or relighting procedures without the correct knowledge or licensing can have serious consequences.
You should call a licensed plumber or gas fitter immediately if you encounter any of the following, it’s crucial to wait before proceeding.
You smell gas at any point:
If you notice the distinctive smell of gas—often described as similar to rotten eggs—do not attempt to relight the unit or investigate further. Evacuate the area immediately and contact your gas provider or emergency services (dial 000 in Australia) from a safe distance. A gas leak can be incredibly dangerous and must be dealt with by a professional.
The pilot won’t stay lit after multiple attempts:
If you’ve followed the relighting steps carefully and held the gas control knob down for the required time (or longer), but the pilot light still won’t stay on, this could indicate a faulty thermocouple, control valve, or another issue that needs proper diagnosis.
There is visible rust, corrosion, or structural damage:
Signs of damage around the burner area, pilot light, or gas control system are a red flag. Corrosion can lead to gas leaks, improper combustion, or equipment failure. A professional can assess whether the unit is safe to continue using or whether repairs or replacement are needed.
You are unsure about your model or procedure:
If you can’t locate your model number, aren’t sure what type of ignition your unit uses, or simply feel uneasy about the process, it’s better to contact a licensed technician. They can ensure the unit is relit correctly and safely.
You don’t have access to the manufacturer’s instructions:
If your water heater doesn’t have a visible instruction label and you can’t find the user manual online, this lack of guidance is reason enough to call in help. Different models have different relighting procedures, and following the wrong process could be dangerous or damage the appliance.
It’s important to remember that in Australia, any gas fitting work—including adjustments, repairs, or even providing relighting instructions—must legally be carried out by a licensed gas fitter or plumber. This regulation is in place to protect consumers from the risks associated with improper handling of gas appliances. Attempting to carry out this work yourself without a licence is not only illegal—it could also void your warranty, breach your home insurance policy, and put your household at risk.
When in doubt, don’t push ahead—pick up the phone and contact a qualified professional. It’s the safest and most responsible decision you can make when dealing with gas systems in your home.
Preventative Maintenance Tips
Keeping your gas water heater in good condition doesn’t have to be hard. A little preventative maintenance can go a long way in ensuring your system runs efficiently, safely, and without issues, especially if you use a long lighter for ignition. In many Australian homes, especially those with outdoor units, small problems like dust build-up or weather exposure can lead to recurring pilot light issues. Regular maintenance helps prevent breakdowns and can extend the life of your hot water system.
1. Schedule Annual Servicing
It’s recommended to have your gas water heater serviced annually by a licensed plumber or gas fitter. During the service, a professional will inspect key components such as the burner, pilot assembly, thermocouple, gas valves, and flue system. The technician will also clean out debris, check for gas leaks, verify pressure levels, and test safety mechanisms. Regular servicing ensures your water heater operates safely, improves efficiency, and helps catch small issues before they become costly repairs.
2. Keep the Area Clean
The area around your water heater, especially for outdoor systems, should be kept clean and free from dust, cobwebs, leaf litter, and insects. Spiders, in particular, are known to nest in and around pilot assemblies, which can cause partial or full blockages. This is a common issue in many parts of Australia. Make it a habit to sweep or wipe down the space around the unit regularly and inspect it for any signs of pest activity or dirt build-up. A clear and tidy surrounding environment will help reduce the likelihood of ignition problems or poor combustion.
3. Install Wind Guards
If your home is located in a windy or coastal area, wind exposure can cause the pilot light to blow out frequently. This is particularly common in cities like Perth or Adelaide where outdoor units are more exposed to the weather. To combat this, speak with your plumber about fitting a wind shield or protective cover designed specifically for your unit. These guards are typically made of metal and are engineered to block wind without impeding ventilation or combustion. A properly installed wind guard can make a significant difference in maintaining a consistent pilot light flame and avoiding unnecessary relights.
4. Upgrade When Necessary
All gas appliances have a limited lifespan, and water heaters are no exception. If your system is over 10 to 12 years old and you’re experiencing ongoing issues—such as repeated pilot outages, rusting components, or inconsistent hot water supply—it may be more cost-effective in the long run to invest in a new system. Modern gas water heaters are more energy-efficient, safer, and designed with better wind protection and advanced ignition systems. Discuss your options with a licensed plumber, who can recommend a suitable model for your household’s needs and arrange safe installation in compliance with Australian standards.
By following these simple yet important maintenance tips, you can help avoid unexpected cold showers, reduce repair costs, and ensure your home’s hot water system remains reliable all year round.
Frequently Asked Questions (FAQs)
Q: How do I know if my water heater uses a pilot light?
A: If your unit has a manual or piezo ignition system, it uses a pilot light. Electronic models don’t.
Q: Can I relight the pilot light myself?
A: Yes, provided you follow safety steps and have the correct type of system. Consult your manual and use caution.
Q: What if my pilot light keeps going out?
A: It could be a faulty thermocouple, dirty pilot tube, or gas supply issue. If in doubt, call a professional.
Q: How often should I service my gas water heater?
A: At least once a year, or more frequently in dusty or coastal environments.
Q: Is it dangerous to relight a pilot light?
A: Not if done correctly and with caution. However, if you smell gas or are unsure, don’t attempt it—call a licensed gas fitter.
Conclusion
Relighting a gas water heater pilot light doesn’t need to be a daunting task. With a clear understanding of your system, the right tools, and a strong focus on safety, most Australian homeowners can handle this common issue confidently. However, never ignore the signs of a deeper problem. If your pilot light keeps going out, or you encounter rust, gas smells, or trouble relighting the system, it’s time to bring in a qualified professional. Hot water is an essential comfort in any home—so when your pilot light flickers out, don’t get left in the cold. Follow this guide, stay safe, and keep your hot water flowing.